Nov. 21, 2018
Easy Upcycle: Turn a Dated Floral Wreath Into a Snowy Winter Wreath
 Nothing brightens up your front door quite like a wreath, right? Well, mine was looking a little forlorn after I'd taken down the holiday decorations, so I decided to upcycle an old, dusty floral wreath into this snowy winter wreath.
Here's the wreath I started with; it originally hung in my childhood bedroom. My sister, mom and I made it forever ago and were really proud of our handiwork at the time. Since then, that bedroom has become a guest room and undergone a somewhat-less-girly makeover so I ended up with the old floral wreath.

Although dusty, the grapevine wreath itself and silk flowers were still in great shape — they just needed a good cleaning and their color 'winterized'. If you're starting with all-new greenery and flowers, you can skip the cleaning/painting steps. And, because my original wreath was lacking greenery, I had to purchase it. I chose boxwood because, as an evergreen, it makes sense in a winter wreath and Dusty Miller for its frosty foliage. The key to creating a faux seasonal wreath that looks not-so-faux is to use greenery and flowers that are in season, either in their fresh or dried state. Dried hydrangeas are perfect for a winter wreath, so I repurposed their silk counterparts from the old floral wreath.
Disassemble + Clean Old Wreath
Remove floral stems. Fill sink with cool water and a few drops of dish liquid, then swirl the stems in soapy water to remove any dust. Place grapevine wreath in the tub and clean it with a good rinse of cool water. Tip: Avoid using warm or hot water for this step as it could cause any glue holding the stems together to melt.
Give any brightly colored flowers you plan to reuse a wintry makeover with a light coat of flat white spray paint. Set painted stems aside and allow to dry.
To make it easy to securely attach the pinecones to the wreath, wrap a length of fine-gauge wire around each pinecone’s stem or weave it through the bottom layer of scales, leaving a 5-6" tail (Image 1). Place pinecones on a disposable surface then give them a frosty makeover by first coating with an even layer of spray adhesive (Image 2) then sprinkling on crystal glitter (Image 3). Tip: Allow glue to 'tack up' by waiting 1-2 minutes before adding glitter.
Using wire snips, cut faux boxwood and Dusty Miller into small sections to make them easier to hot-glue to the wreath. Tip: Some faux greenery can simply be pulled apart; no cutting required.
 Attach Boxwood
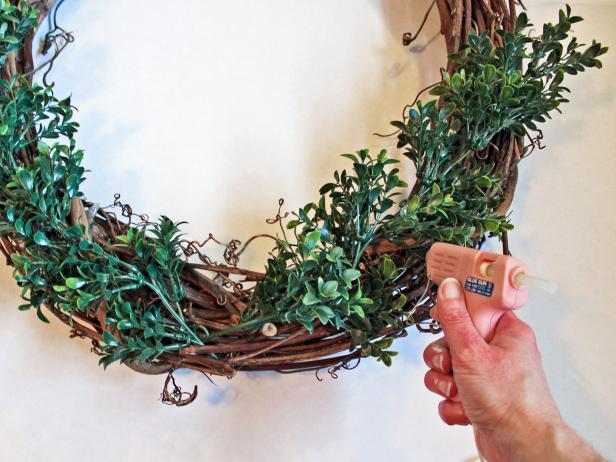
Use hot glue to attach boxwood sprigs to the bottom two-thirds of the wreath (Image 1), being sure to tuck the greenery's cut ends into the grapevine wreath. Leave the top third of the wreath uncovered both to add a bit of woodsy charm and to make hanging the wreath easier. Continue adding boxwood sprigs till you've adequately covered the wreath's front and sides (Image 2). Tip: The center bottom area will later be covered with flowers so no need to completely cover it.
Add a dab of hot glue to the greenery’s cut ends, then attach small sections of Dusty Miller to the wreath’s front and sides, interspersing it with the boxwood.
Using wire snips, cut berry stems into small sections (Image 1). Add a dab of hot glue to the end, then attach to wreath. Continue adding berries to the wreath till you're satisfied with the look (Image 2).
 Wire-On Pinecones
Determine each pinecone's placement, then wrap the wire end around one of the wreath's vines to securely attach it.
Using wire snips, cut stems about 2-3" below hydrangea blooms. Add hot glue to the back of each bloom, then press into place, working the short, remaining stem into the grapevine wreath.
Place wreath on paper or plastic drop cloth, then evenly coat the wreath's front and sides with spray adhesive (Image 1). Allow glue to 'tack up' for a minute or so, then sprinkle on faux snow (Image 2). Tip:Tilt the wreath in different directions as you apply the snow to ensure even coverage.
 Proudly Display
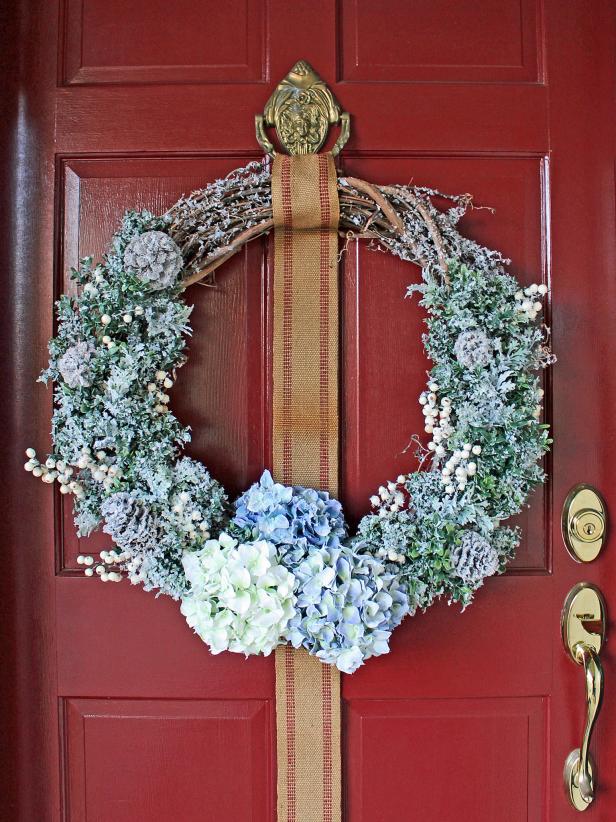
Wrap heavy-duty ribbon or furniture webbing around the wreath's top, securing it with hot glue, then hang the completed wreath on your front door (Image 1). If preferred, you can use a wreath hanger instead. Tip: The snowy effect will be most visible on a colorful door (Images 2 and 3) so you may want to skip this step if your front door is white.
Original Article via HGTV

Comments
Post a Comment